
From the previous post, this is definitely a follow up to enable my vanity email.
I was recommended by a friend to try our Zoho mail as it is free and offer use of customed domains.
Here are the results and how to get started.
First sign up a free plan with Zoho at Zoho Mail Pricing and Editions – Free for 5 Users
Do not panic, scroll down to view the free plan sign up.

Next is just by adding custom domain in the admin console of Zoho.
Pre-requisite you already have a doman setup.
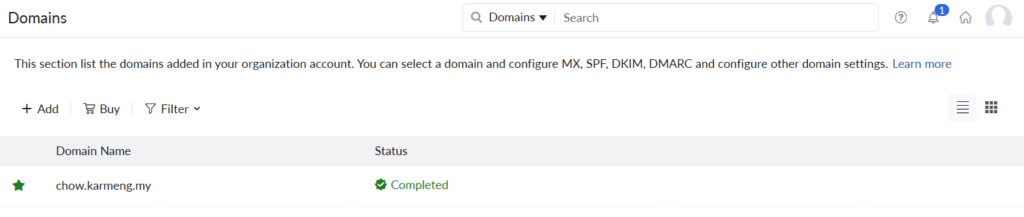
Verify your domain. Once your domain is verified in Zoho, you should get the following screen.
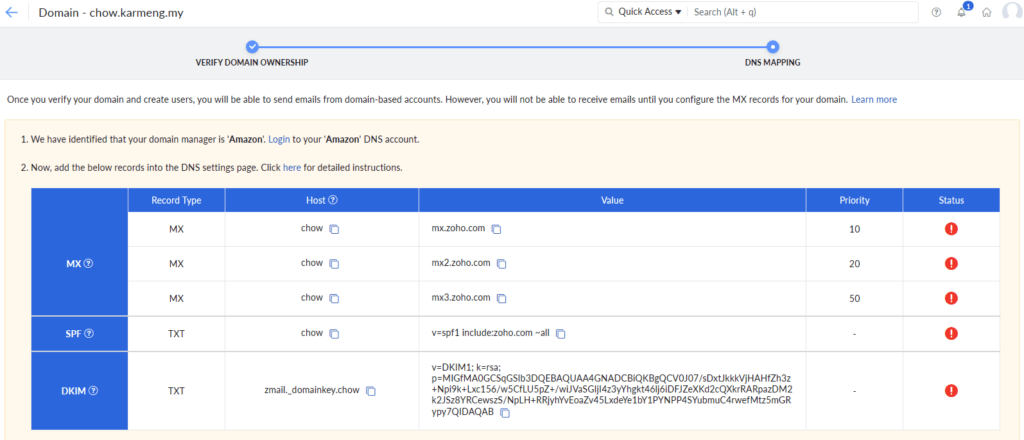
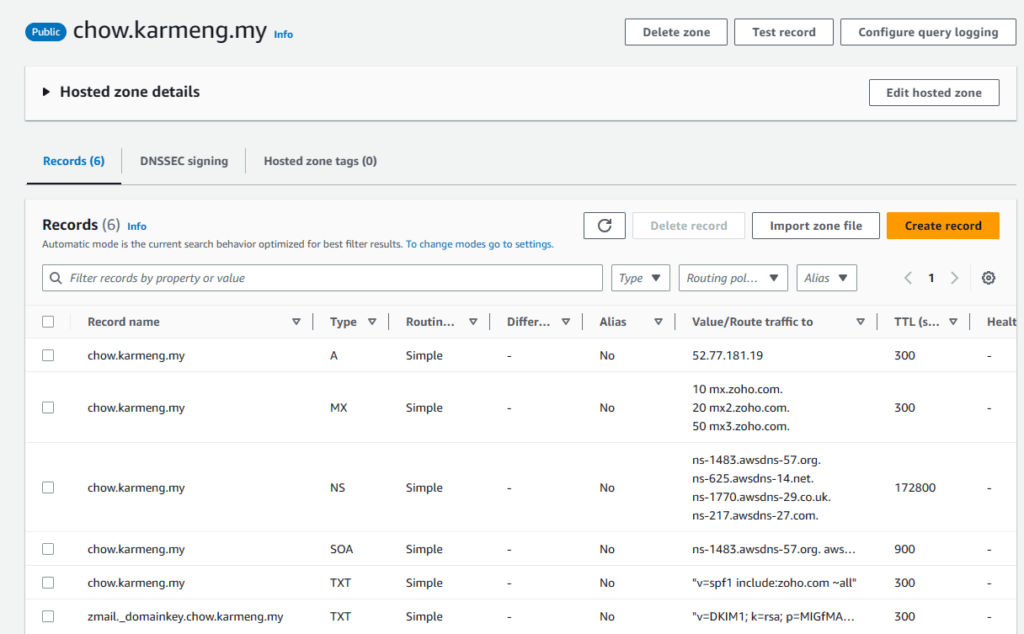
Then add MX records, SPF into your domain in your DNS server. In this example, AWS Route 53 are featured.
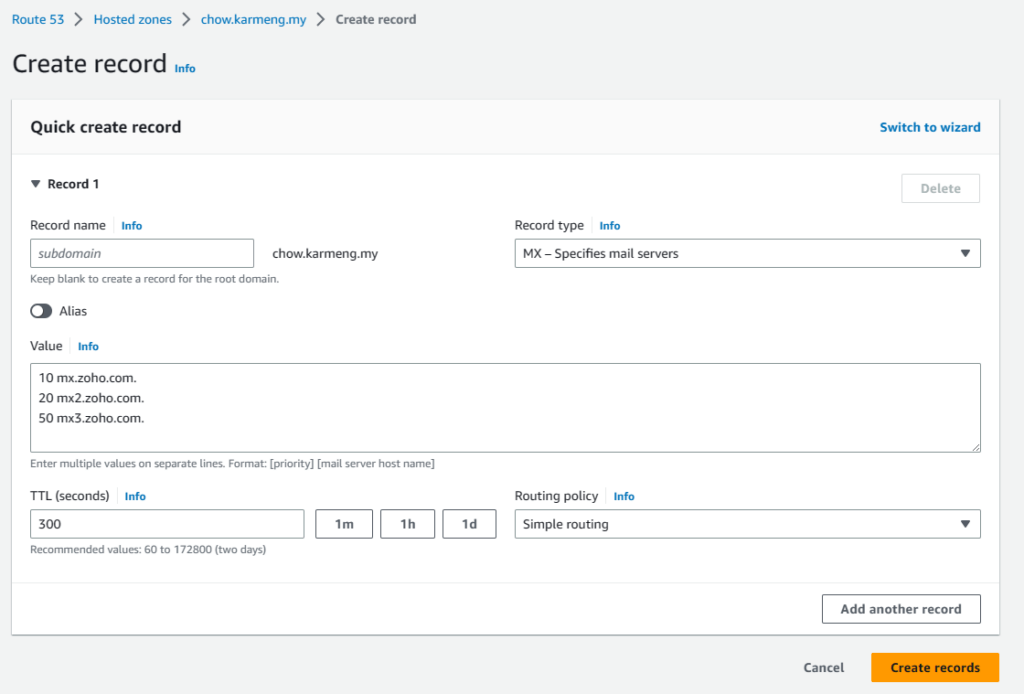
Start adding the MX into your domain, ensure that each of the mx host name has “.” at the end of the host.
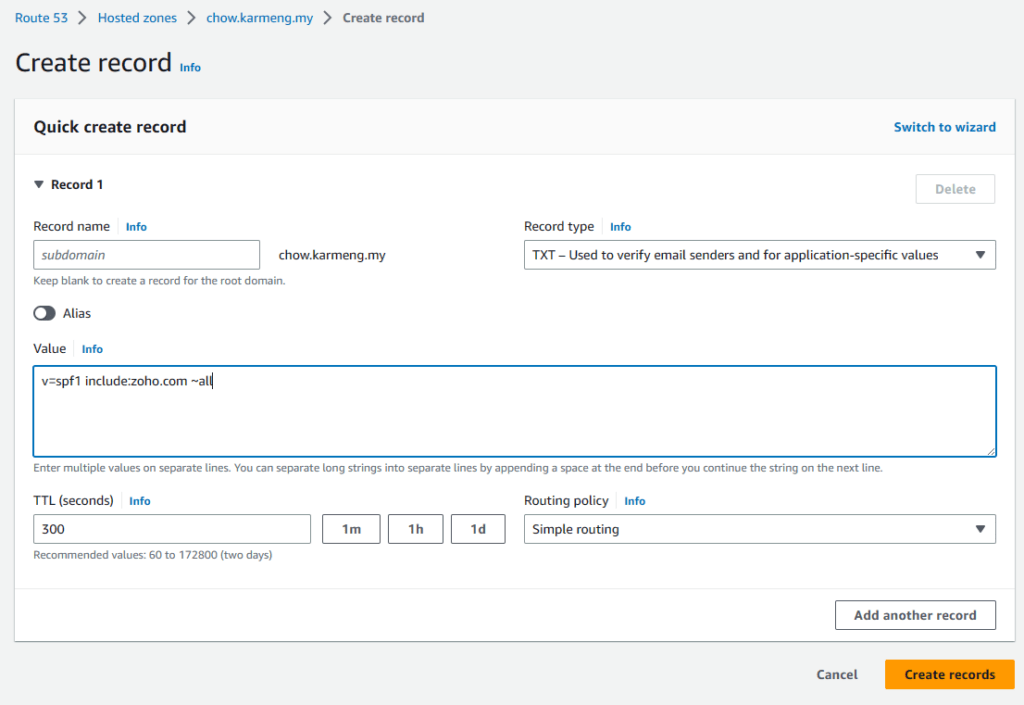
Before adding the SPF, kindly have the TXT record that were used verifying your domain with Zoho is removed.
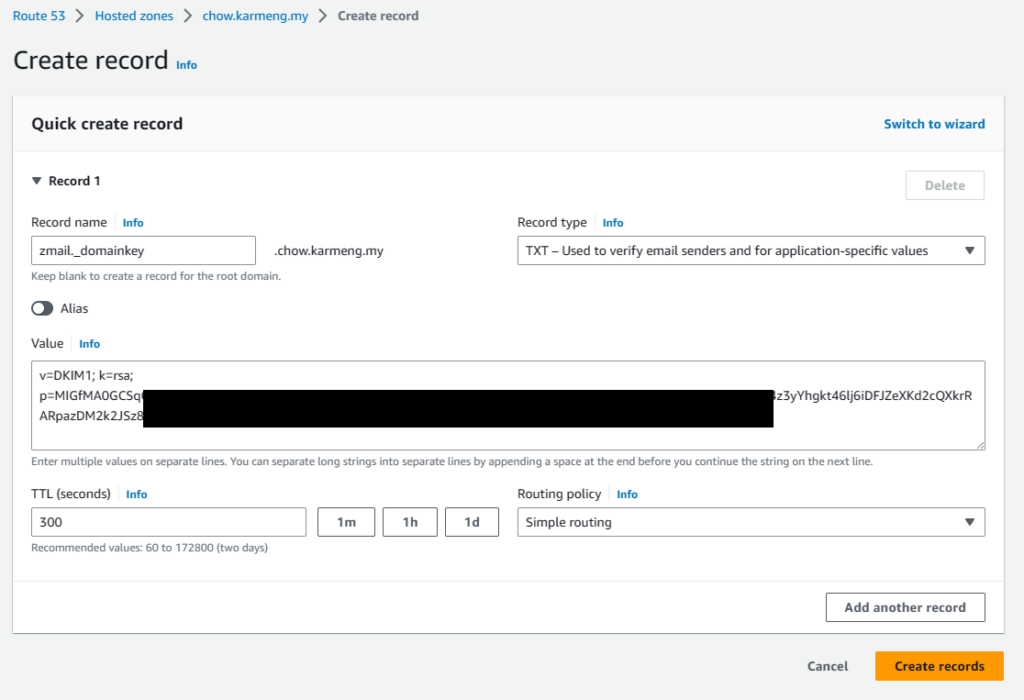
Continue to add the dkim into Route 53 DNS zone.
Once, all the needed entry entered, verify the records in the Route 53.
Then, verify the DNS from the Zoho admin console. If things are good you should be seeing something like this.
Finally, from the Zoho admin console, create your email account. Send email to the newly created email address to test. If everything is done correctly, you should be seeing your test email in the Zoho mail web interface.
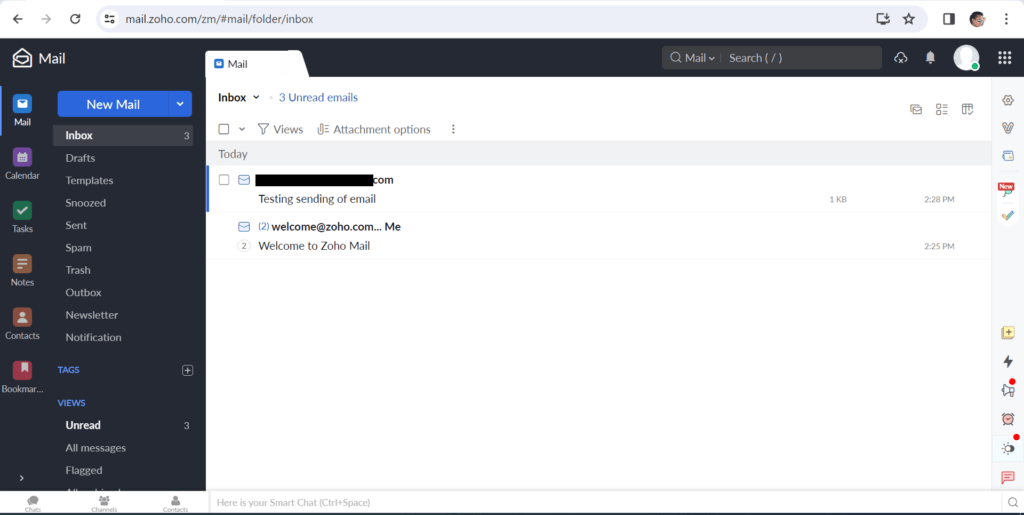
The downside of Zoho free email account is that POP and mail forwarding is disabled, the only way to receive emails are via its webmail client which is accessible at Zoho Accounts