
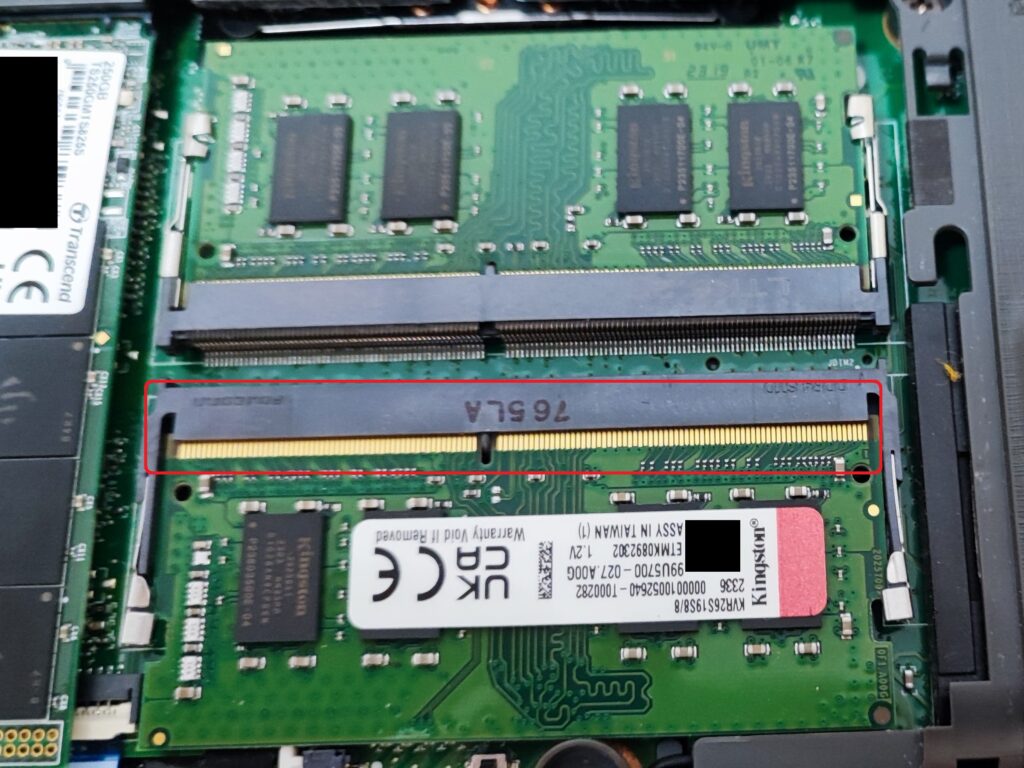
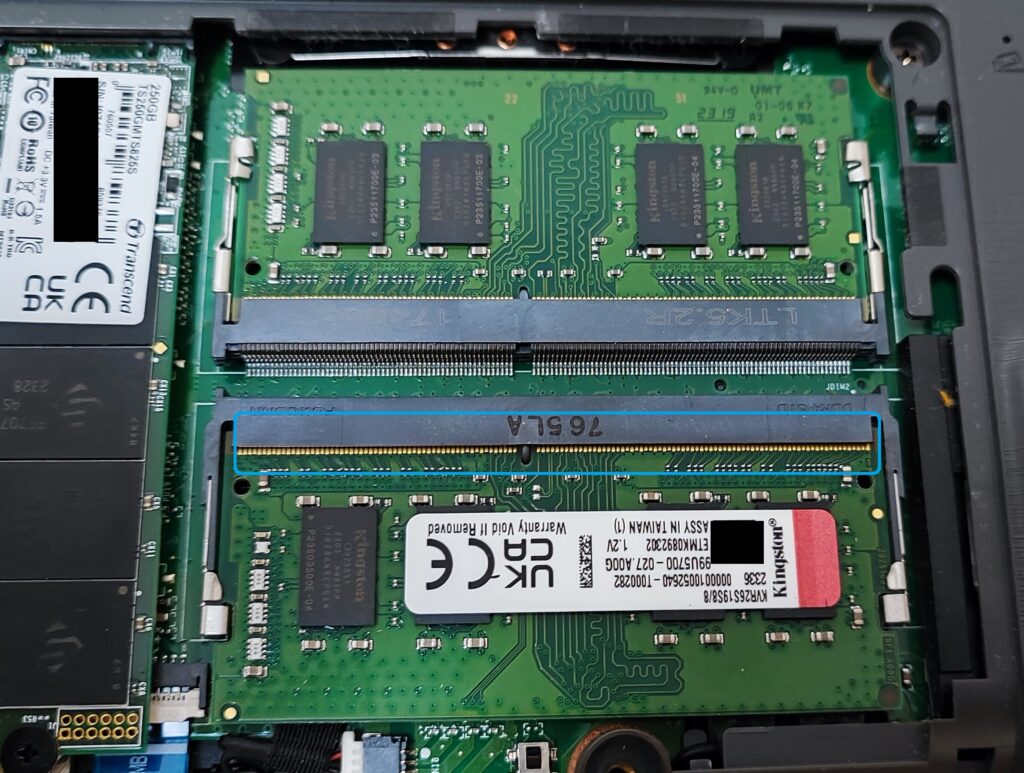
First assuming that compatible hardware is available, get compatible SODIMM RAM. and identify type of hard disk your laptop can use.
General idea, check the laptop user manual to identify what are the maximum RAM that are supported total, what are the maximum RAM supported in a slot. And importantly does the motherboard chipset of your laptop supports SODIMM that are different capacity. Clock speed as long as its higher than the laptop spec, the motherboard chipset will automatically tune the RAM Clock speed to match the maximum speed supported by the motherboard.
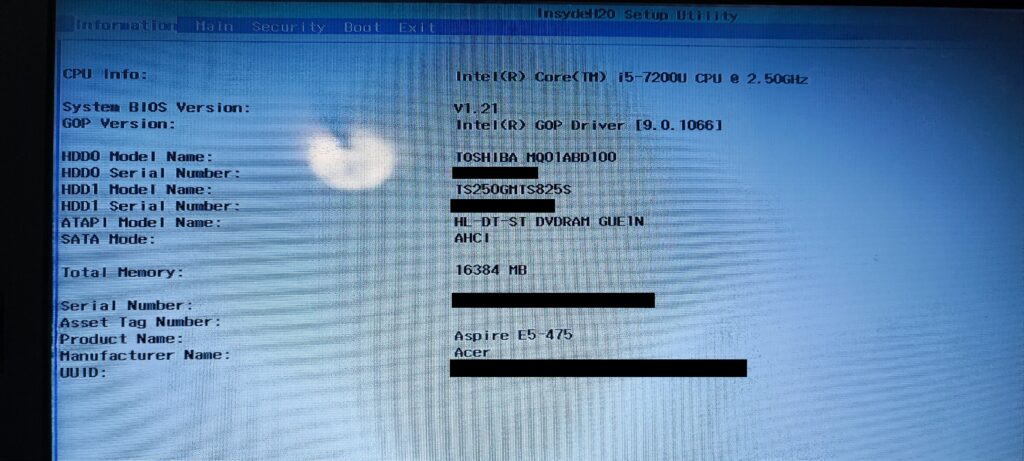
For context, the old laptop for upgrade is an Acer Aspire E5-475 which comes with 4GB RAM, 1TB HDD that has an Intel i5-7200U CPU at 2.5GHz.
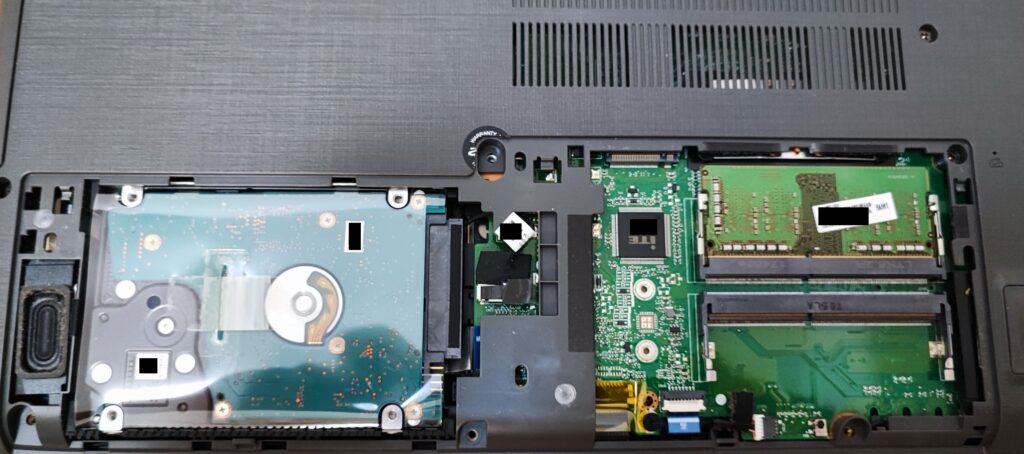
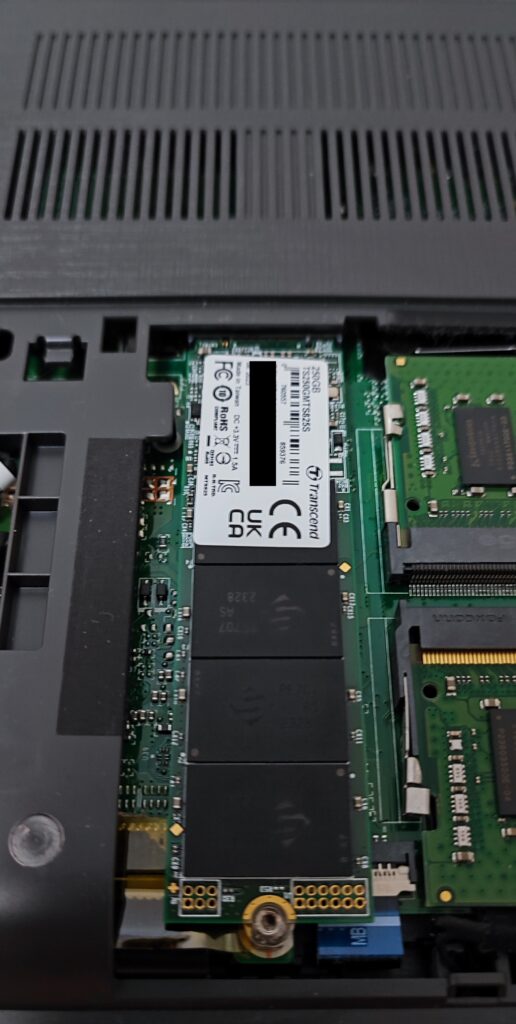
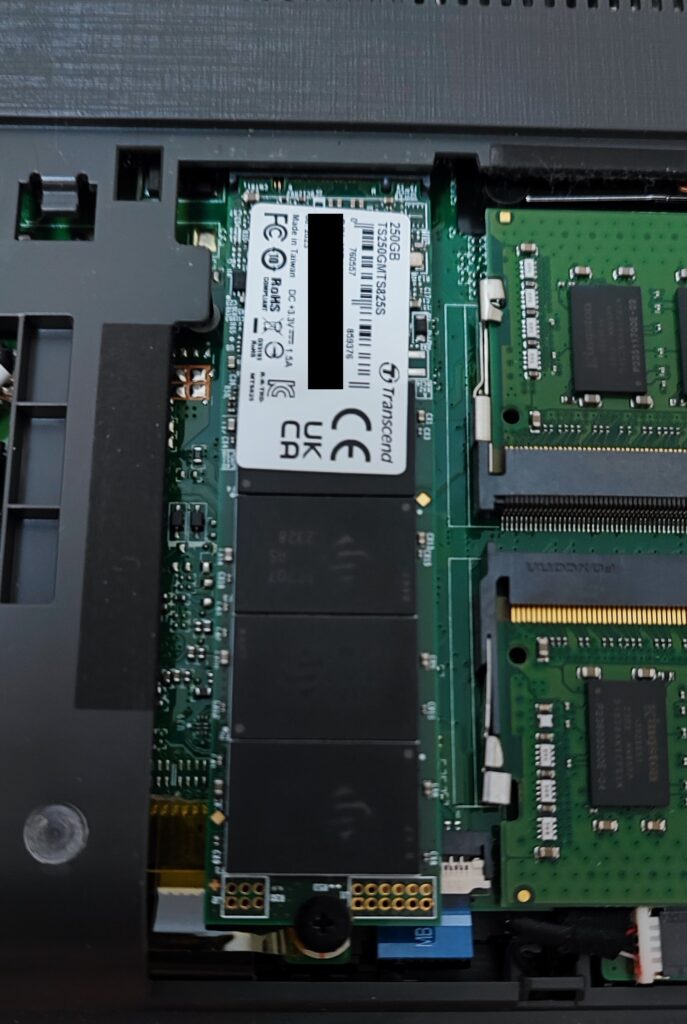
After some shopping at Lowyat, and knowing the laptop to support DDR4 and m.2 SATA SSD.

RAM are installed first.
Proceed to install the M.2 SSD.

Next, boot up the laptop, and go into its BIOS to confirm the installed hardware are detected at BIOS level.
In this upgrade, there is no attempt to clone a 1TB HDD to a 250GB SSD, in this context it is not worth the time and having a 500Mbps broadband, reinstallation of software and update will be a breeze.
Instead, the create a windows 10 installation media (link is working in Jan 2024) are used to create a bootable Windows 10 installer.
Once the Windows 10 installation media is created, change the boot order as shown in the below picture. BIOS for different manufacturers will differs, so just understand the concept.
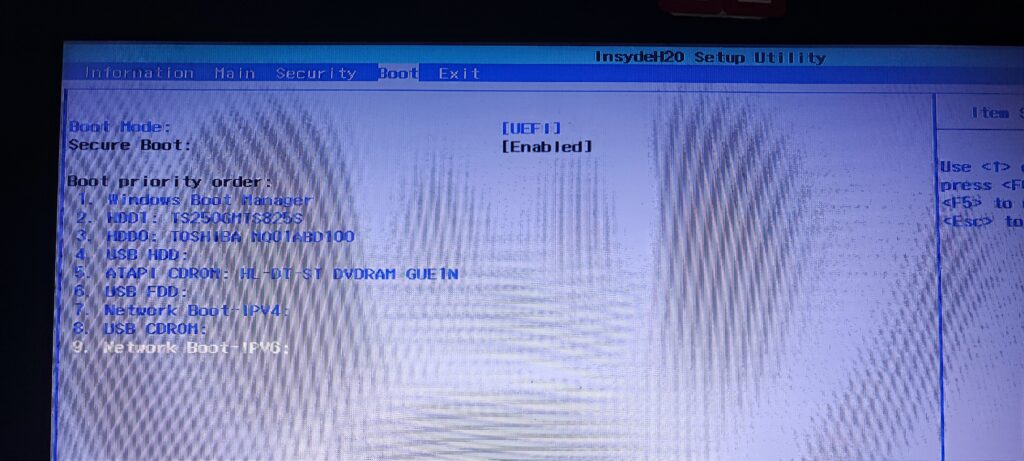

Always make sure the created Windows 10 installation media are created in a USB, and the bootable USB must be placed above the Windows Boot Loader.
Remember to remove the USB drive after first boot of the Windows 10 installer wizard. This is to avoid rebooting back the USB drive.
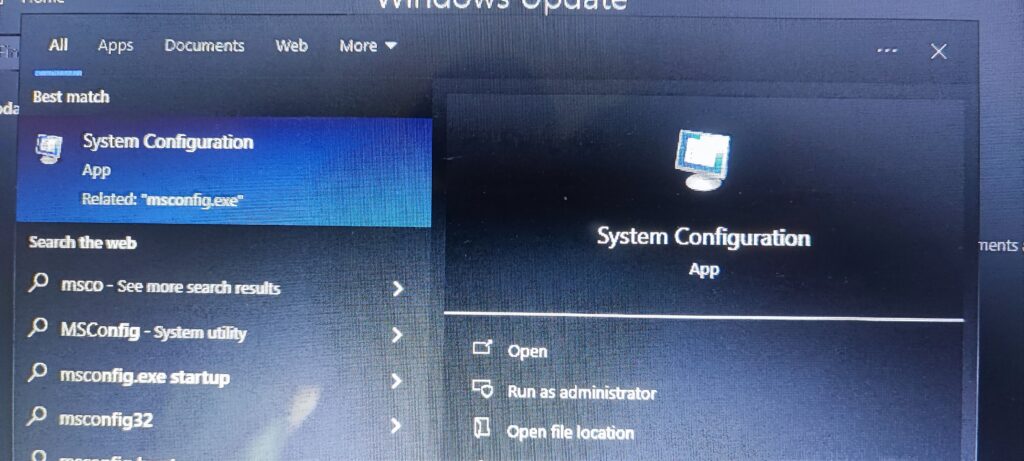
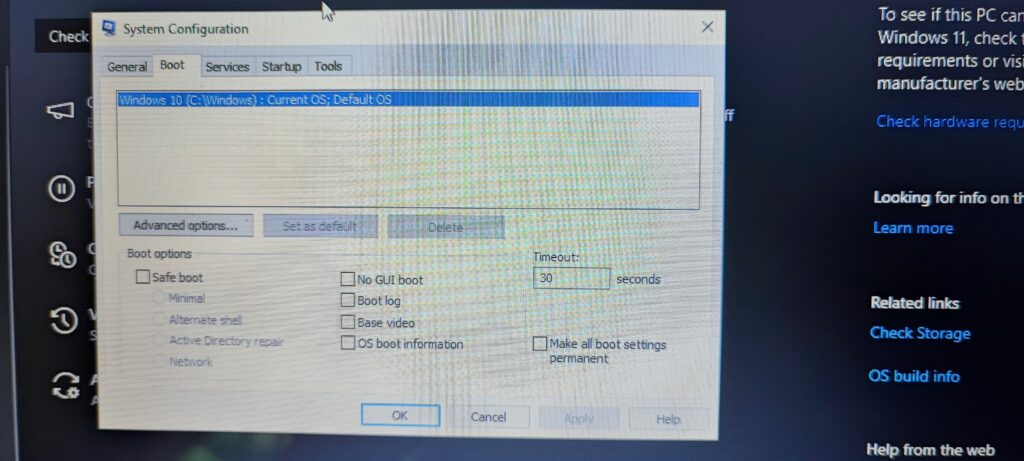
By moving to this route, the Windows 10 bootloader will still show the old OS. To clean up the boot loader, after booting into the Windows 10 of the SSD. Use the msconfig to remove the old location of the Windows 10 from the bootloader.
Extra observation Windows 10 upon installation will take about 33.1GB of space in the hard disk. For today standards, 33.1GB are considered small.

With this, upgrade by spending MYR 259, it is money well spent to breathe new life into the old laptop. Pay 10% instead of MYR 2590 for a new laptop. And this is the way to make an old laptop to work as new again.