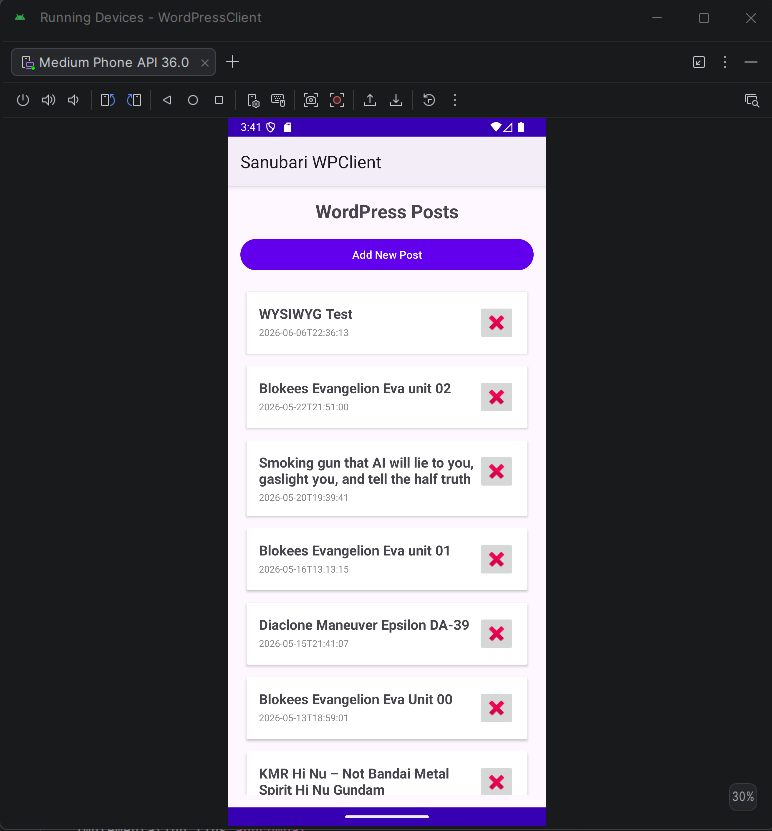
The biggest hurdle of creating an App for android device is learning how to use its tool chain.
This is how I did it using AI and AI Agent or AI Assistance.
Continue reading
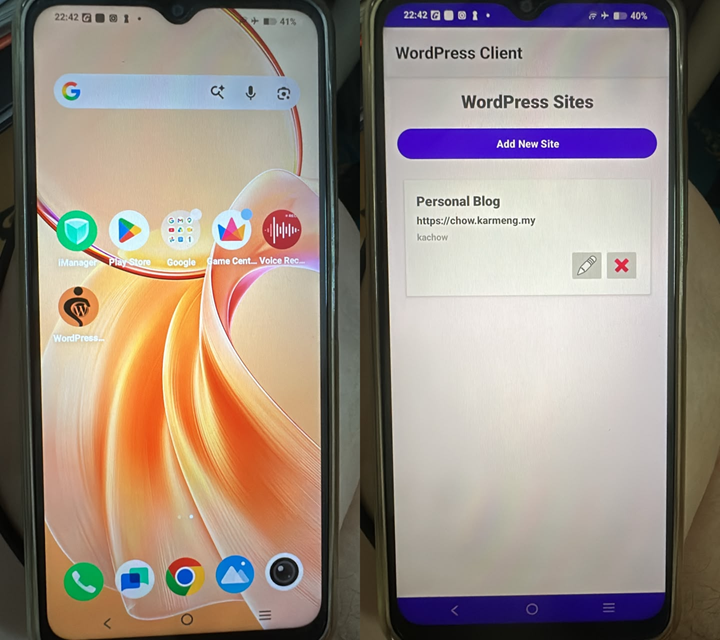
The biggest hurdle of creating an App for android device is learning how to use its tool chain.
This is how I did it using AI and AI Agent or AI Assistance.
Continue readingThis is a summary dieting and body recompositing plan using DeepSeek after 3 months of notes and driven by data.
How to Lose Fat, Build Muscle, and Redefine Your Health After 40
This guide is based on the proven principles demonstrated over a 3-month journey that resulted in:
1. Cardio First, Strength Second: The 1-2 Punch
2. The Gradual Carb Reduction Strategy
3. Embrace Intelligent Hunger
4. Respect Rest Days
The Workout Structure:
The Nutrition Strategy:
Track Beyond the Scale:
Adopt the Right Mindset:
This formula requires discipline. It is demanding. However, the rewards are not just a better-looking body, but a fundamentally healthier one: better sleep, no more energy crashes, reduced disease risk, and the vitality of someone years younger.
Your journey is living proof that through consistent, intelligent effort—including the patient, phased approach to nutrition—you can fundamentally reshape your body and health, no matter your starting point.
This post is based mostly on Installing ESP32 Board in Arduino IDE 2 (Windows, Mac OS X, Linux) | Random Nerd Tutorials it is a good resource to get started on verify the ESP32-WROVER is working.
The hardest part is to determine what are the connector chip and installing libraries into Arduino IDE. Refer to the shared link in the beginning of this post.
Code from DeepSeek for a complicated hello world, assuming to make the LED blinks in morse code:
#include <Arduino.h>

#define LED_PIN 2  // Built-in LED on GPIO 2

// Morse code representations for A-Z
const char* morseCodes[] = {
  ".-",    // A
  "-...",  // B
  "-.-.",  // C
  "-..",   // D
  ".",     // E
  "..-.",  // F
  "--.",   // G
  "....",  // H
  "..",    // I
  ".---",  // J
  "-.-",   // K
  ".-..",  // L
  "--",    // M
  "-.",    // N
  "---",   // O
  ".--.",  // P
  "--.-",  // Q
  ".-.",   // R
  "...",   // S
  "-",     // T
  "..-",   // U
  "...-",  // V
  ".--",   // W
  "-..-",  // X
  "-.--",  // Y
  "--.."   // Z
};

void setup() {
  pinMode(LED_PIN, OUTPUT);  // Set the LED pin as an output
  Serial.begin(115200);
}

void loop() {
  String message = "SOS";  // Message to transmit in Morse code
  message.toUpperCase();   // Convert message to uppercase

  // Transmit the message in Morse code
  for (int i = 0; i < message.length(); i++) {
    char currentChar = message[i];
    if (currentChar >= 'A' && currentChar <= 'Z') {
      transmitMorse(morseCodes[currentChar - 'A']);  // Transmit Morse code for the character
    } else if (currentChar == ' ') {
      delay(1400);  // Gap between words (7 units)
    }
    delay(600);  // Gap between letters (3 units)
  }

  delay(2000);  // Wait before repeating the message
}

// Function to transmit a Morse code pattern
void transmitMorse(const char* morseCode) {
  for (int i = 0; i < strlen(morseCode); i++) {
    if (morseCode[i] == '.') {
      blinkDot();  // Transmit a dot
    } else if (morseCode[i] == '-') {
      blinkDash();  // Transmit a dash
    }
    delay(200);  // Gap between dots/dashes (1 unit)
  }
}

// Function to blink a dot (short flash)
void blinkDot() {
  digitalWrite(LED_PIN, HIGH);  // Turn the LED on
  delay(200);                   // Dot duration (1 unit)
  digitalWrite(LED_PIN, LOW);   // Turn the LED off
}

// Function to blink a dash (long flash)
void blinkDash() {
  digitalWrite(LED_PIN, HIGH);  // Turn the LED on
  delay(600);                   // Dash duration (3 units)
  digitalWrite(LED_PIN, LOW);   // Turn the LED off
}
Code to connect to WiFi:
#include <WiFi.h>
// Replace with your network credentials
const char* ssid = "myhome4iot";
const char* password = "i have the longest wifi password ever";
void setup() {
Serial.begin(115200);
// Connect to Wi-Fi
WiFi.begin(ssid, password);
Serial.println("Connecting to Wi-Fi...");
// Wait for connection
while (WiFi.status() != WL_CONNECTED) {
delay(1000);
Serial.print(".");
}
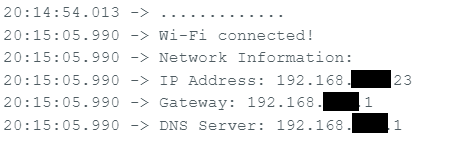
// Connection successful
Serial.println("\nWi-Fi connected!");
// Get and print network information
IPAddress ip = WiFi.localIP();
IPAddress gateway = WiFi.gatewayIP();
IPAddress dns = WiFi.dnsIP();
Serial.println("Network Information:");
Serial.print("IP Address: ");
Serial.println(ip);
Serial.print("Gateway: ");
Serial.println(gateway);
Serial.print("DNS Server: ");
Serial.println(dns);
}
void loop() {
// Nothing to do here
}
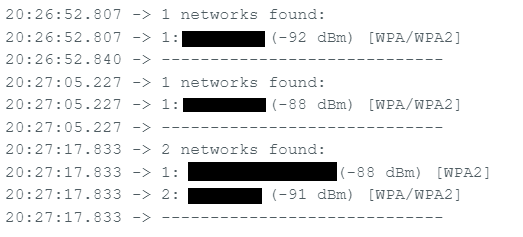
Code to scan WiFi:
#include <WiFi.h>

void setup() {
  Serial.begin(115200);

  // Set ESP32 to station mode
  WiFi.mode(WIFI_STA);
  WiFi.disconnect();  // Disconnect from any previous connection
  delay(100);

  Serial.println("Starting Wi-Fi scan...");
}

void loop() {
  // Scan for nearby Wi-Fi networks
  int numNetworks = WiFi.scanNetworks();

  if (numNetworks == 0) {
    Serial.println("No networks found.");
  } else {
    Serial.print(numNetworks);
    Serial.println(" networks found:");
    for (int i = 0; i < numNetworks; i++) {
      // Print SSID and RSSI for each network
      Serial.print(i + 1);
      Serial.print(": ");
      Serial.print(WiFi.SSID(i));  // SSID
      Serial.print(" (");
      Serial.print(WiFi.RSSI(i));  // Signal strength (RSSI)
      Serial.print(" dBm)");
      Serial.print(" [");
      Serial.print(getEncryptionType(WiFi.encryptionType(i)));  // Encryption type
      Serial.println("]");
    }
  }

  Serial.println("-----------------------------");
  delay(10000);  // Wait 10 seconds before scanning again
}

// Function to convert encryption type to a human-readable string
String getEncryptionType(wifi_auth_mode_t encryptionType) {
  switch (encryptionType) {
    case WIFI_AUTH_OPEN:
      return "Open";
    case WIFI_AUTH_WEP:
      return "WEP";
    case WIFI_AUTH_WPA_PSK:
      return "WPA";
    case WIFI_AUTH_WPA2_PSK:
      return "WPA2";
    case WIFI_AUTH_WPA_WPA2_PSK:
      return "WPA/WPA2";
    case WIFI_AUTH_WPA2_ENTERPRISE:
      return "WPA2 Enterprise";
    case WIFI_AUTH_WPA3_PSK:
      return "WPA3";
    case WIFI_AUTH_WPA2_WPA3_PSK:
      return "WPA2/WPA3";
    default:
      return "Unknown";
  }
}
Unfortunately, due to the ESP32-WROVER hardware limitation, any modern 5GHz WiFi will not be able to be scanned or detected. On top of that, the stock ESP32-WROVER-IE needs to have a actual wifi cable to extend its range.

For the folks that are impatient, the POC of DeepSeek is here KarMeng / deepseek-simple / localdev — Bitbucket
Continue reading